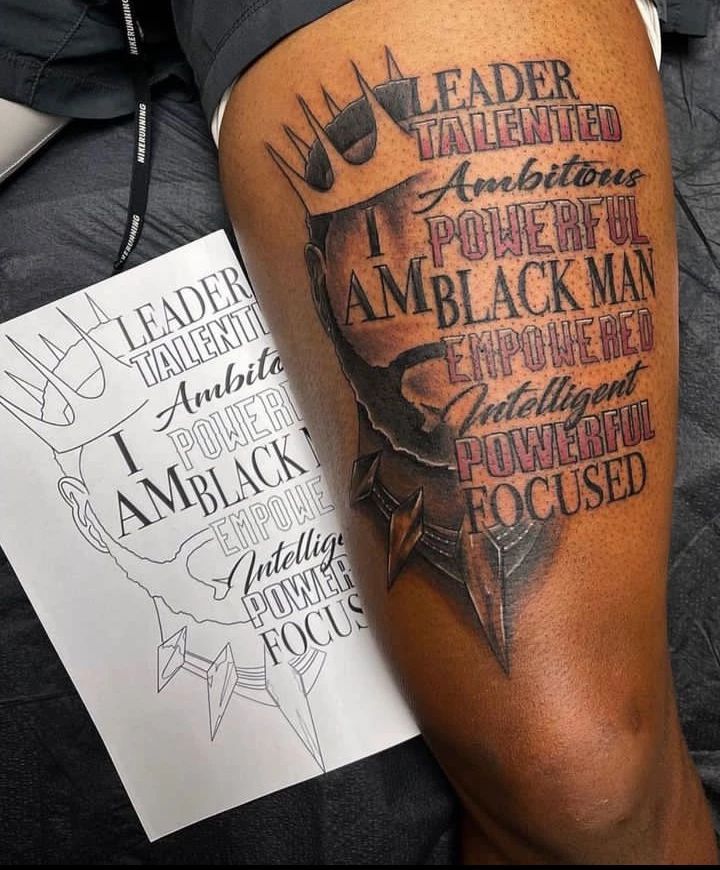
Welcome, fellow ink enthusiasts and dedicated artists! We’re stoked to bring you another riveting piece here at TriednTrueTattoo.com, where we’re all about that body art life. Today, we’ll be diving into the essential skill every tattoo virtuoso needs in their arsenal – the art of transferring a tattoo stencil to the skin. Whether you’re a seasoned tattooist or an aspiring ink slinger, we’ve got you covered with tips, tricks, and techniques to perfect your stencil game.
Transferring a stencil might seem like a simple step, but it’s a critical one that sets the tone for the entire tattooing process. It’s the blueprint that guides your needle as you etch your client’s skin with a permanent masterpiece. So buckle up, grab your thermofax and hectograph paper, and let’s get down to the nitty-gritty of stencil transfer mastery. Stay tuned, and soon you’ll be laying down crisp, clean lines like a pro!
How to transfer a tattoo stencil in 8 easy steps
Step 1: Prepare the stencil
- Choose a design and size it appropriately using design software like Adobe Illustrator or Procreate.
- Convert the image into a stencil-friendly format by changing it to black and white or grayscale and adjusting the contrast for clearer lines.
- Print the design onto hectograph paper using thermofax machine, ensuring proper alignment for the best results.
Step 2: Assemble the necessary materials and tools
Gather hectograph paper, a thermofax machine, stencil transfer solution, green soap, witch hazel, a clean cloth or paper towel, and a disposable razor.
Step 3: Prepare the client’s skin
- Clean the area where the tattoo will be placed using a solution of green soap and water, removing dirt, oil, and bacteria with a clean cloth or paper towel.
- Carefully shave the area to remove any hair that may interfere with the stencil transfer.
- Apply a thin layer of witch hazel to the skin to create a barrier that helps the stencil adhere.
Step 4: Apply the stencil transfer solution
Apply a generous amount of stencil transfer solution to the prepared area of the skin, ensuring even coverage.
Step 5: Align and apply the stencil
- Carefully position the stencil on the skin, taking your time to align it accurately with the desired placement.
- Gently press the stencil onto the skin, smoothing it out using your fingers or a clean cloth to ensure there are no bubbles, creases, or inconsistencies in the transfer.
Step 6: Remove the stencil and assess the transfer
- Carefully peel the stencil away from the skin, starting at one corner and working your way across the design.
- Evaluate the transfer for clarity, completeness, and accuracy. If necessary, touch up any areas that didn’t transfer properly or reapply the stencil if needed.
Step 7: Address any issues or troubleshooting
- In case of an incomplete or distorted transfer, reapply the stencil transfer solution and press the stencil onto the skin again, or create a new stencil if the original is damaged.
- If the stencil bleeds, blot the excess solution with a paper towel before pressing the stencil onto the skin.
- If the stencil doesn’t adhere properly, ensure the skin is clean and dry, apply more transfer solution, or adjust the pressure on the skin when applying the stencil.
Step 8: Allow the stencil to dry
After the stencil is applied, allow it to dry for a few minutes before proceeding with the tattooing process. This helps the stencil adhere better and prevents smudging during the tattooing process.
What can I use to apply tattoo stencils?
To apply tattoo stencils, you can use various methods and materials. Here are some of the most common options:
- Stencil transfer solution: This is a specially formulated solution that helps the stencil adhere to the skin. Popular products include Stencil Stuff, Electrum, and Nikko Hurtado’s Anchored.
- Acetone-free deodorant: Some artists use a stick of acetone-free, unscented deodorant to apply stencils. The glycerin in the deodorant helps the stencil adhere to the skin.
- Soap and water: A mild soap and water mixture can be used to dampen the skin before applying the stencil. This method may not be as effective as using a stencil transfer solution or deodorant, but it can work in a pinch.
- Gel deodorant: A clear, unscented gel deodorant can also be used as a stencil application medium. Just like the stick deodorant, the glycerin content helps the stencil adhere to the skin.
- DIY stencil transfer solution: You can create your own stencil transfer solution using a mixture of water, witch hazel, and glycerin. The ratio is typically around 50% water, 25% witch hazel, and 25% glycerin, but you can adjust the proportions to suit your preference.
Bottom Line
In conclusion, transferring a tattoo stencil to the skin is a crucial step in the tattooing process, as it sets the foundation for a precise and accurate final result. By following the detailed steps outlined in this article, selecting the right materials and tools, and practicing your technique, you’ll be well on your way to mastering the art of stencil transfer. As a tattoo artist, your commitment to perfecting this skill will not only enhance the quality of your work but also contribute to the satisfaction of your clients. Remember, a flawless stencil transfer is essential for achieving exceptional tattoo artistry, so take your time, be patient, and refine your skills to create lasting and impressive masterpieces.


